
So, you’ve just bought a new monitor after watching countless reviews, and are enjoying its superior image quality, thanks to a high resolution, refresh rate, and high-quality panel. If you haven’t properly configured the settings in the OSD, however, you might not be viewing your games and media in the best possible way. These settings might not be as apparent as the refresh rate, resolution, and FreeSync, and can go overlooked for months. Here’s your sign to head into your monitor’s OSD, and change these settings to enjoy your display to the fullest.
5 Color temperature and gamma
They have a huge impact on the overall image
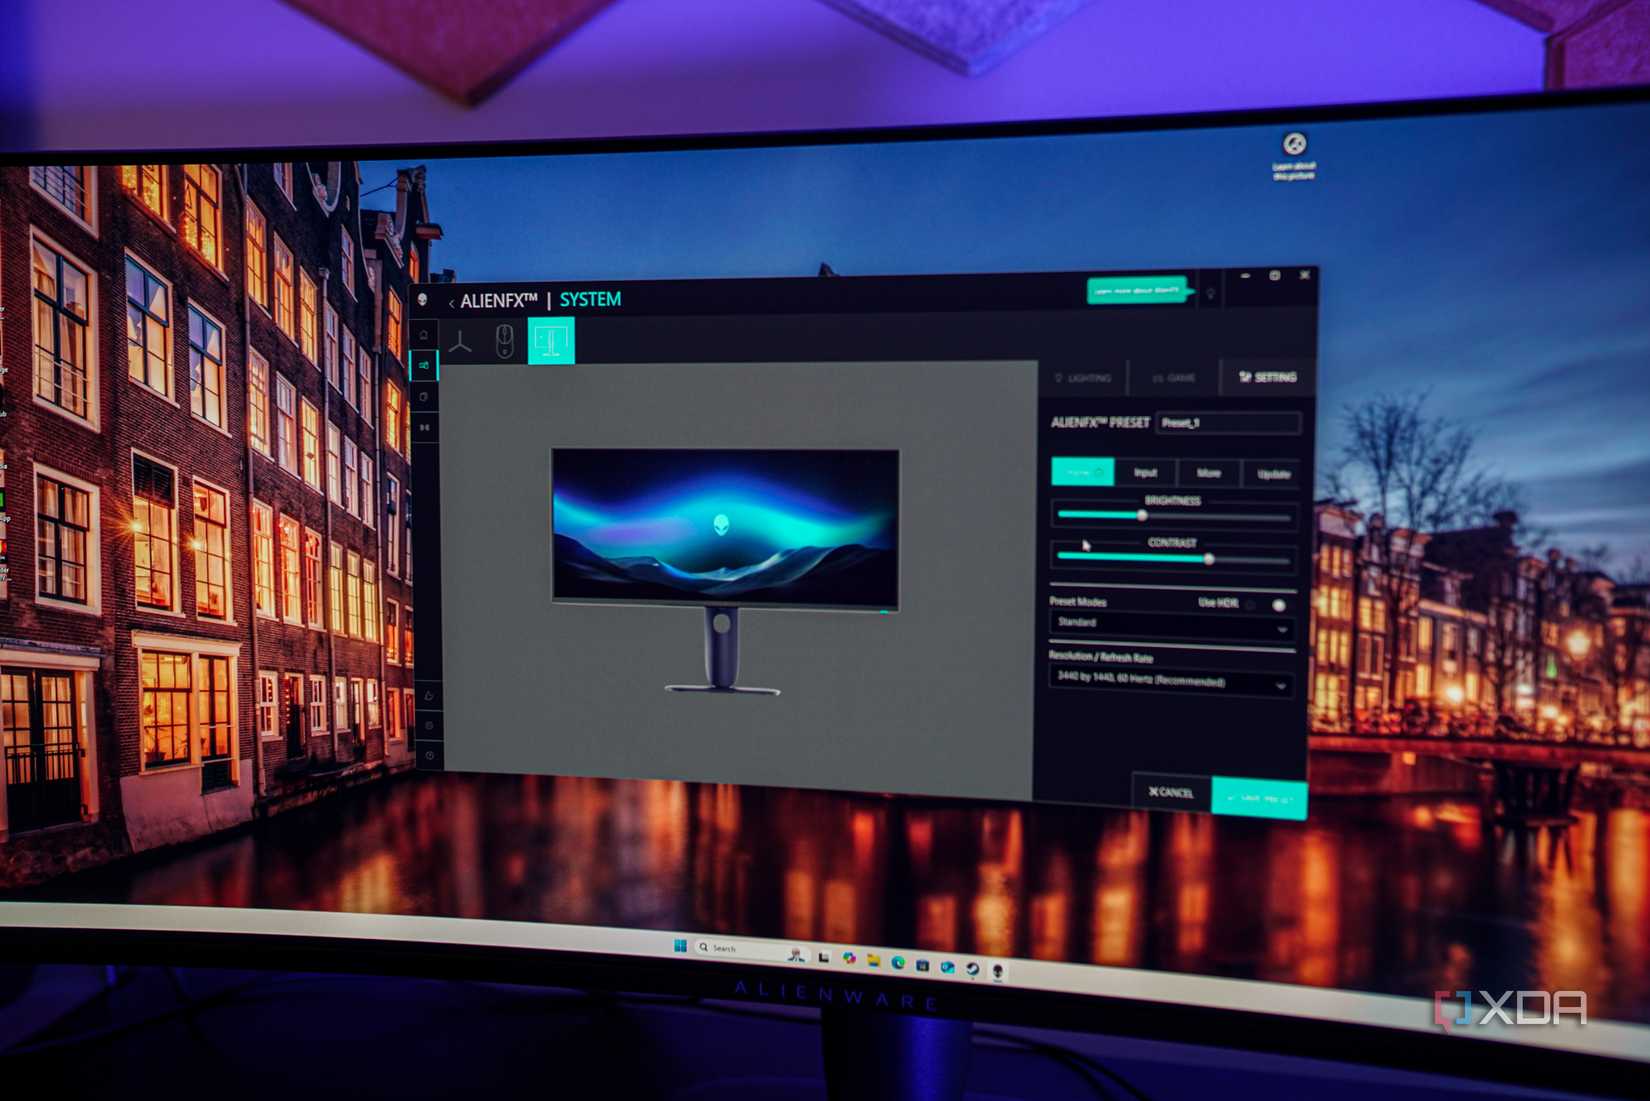
While many users recommend downloading ICC profiles for your monitor model, they often turn out to be imprecise due to manufacturing tolerances. I suggest you go by what looks right to you on the screen, and adjust the color temperature of your display accordingly. You can start with the presets already configured on your monitor, such as Game, FPS, RTS, sRGB, Reader, and more. These presets can often be exactly what you’re looking for in terms of the color vibrance, hue, brightness, contrast, and other parameters.
Other users who’re not satisfied with the presets can head into the color temperature settings in the OSD. These are commonly labeled “Warm”, “Cool”, and “Custom” — that last mode will allow you to configure individual sliders for Red, Green, and Blue hue and saturation. You can make your display look exactly the way you want. My LG monitor has multiple presets under Cool and Warm, and I find one of the Cool presets to be the perfect temperature for my tastes.
Another setting that can make a huge difference to the overall “flavor” is gamma, and you can again choose from multiple presets. Most people find the “2.2” setting the best — you can start from there, and tune it to your liking.
4 Overdrive or response time
Make use of that 0.1ms response time

This setting is displayed under different names on different monitors — response time, overdrive, OD — and dials in the aggressiveness of your display’s response time. The usual settings in the Overdrive menu are “Fast”, “Faster”, “Normal”, and “Off.” While I recommend that most people use the Fast mode, the results can vary for your particular model. The objective here is to choose the fastest response time without introducing other problems.
You can try the ghosting UFO test with each available mode, and see which one has the sharpest image and least ghosting (bluriness). Choosing the most aggressive setting can often introduce inverse ghosting, which shows tails or halos around fast-moving objects. Choose the setting that looks right to you, since this can be subjective. It’s important to try each of the modes before you start gaming on your new monitor, so that you aren’t missing out on anything.
3 Automatic brightness
Thanks, but no thanks
Almost all gaming monitors have an automatic brightness feature labeled adaptive brightness, smart contrast, DFC (Digital Fine Contrast), or something similar. It’s meant to dynamically adjust screen brightness depending on what’s on the screen. While it might sound like a smart and useful feature, it’s mostly an annoyance, especially during gaming. You don’t want aggressive brightness reduction when a scene turns from bright to dark, or vice versa.
It’s best to set your own brightness and contrast values in one of the custom presets in the OSD, or pick one of the pre-configured ones. Avoiding dynamic brightness usually gets you the best experience in gaming, or otherwise. You can choose brightness settings that you arrive at after hit and trial, and stick with what works for you instead of relying on the monitor’s algorithm, which is almost always inaccurate.
2 HDR settings
It’s not as automatic as it might seem

This one is more of a Windows setting rather than a monitor setting, but they’re closely linked. To ensure you’re getting the best possible HDR experience on your PC, the right brightness, contrast, and color temperature are essential, but your Windows HDR settings should also be configured properly. The best advice when dealing with HDR on PC is to use it only when required. So, toggle it on (Win + Alt + B) when you’re playing a game or movie that supports HDR, and toggle it off when using Windows outside of them.
The next thing you should also do is use the HDR Calibration app on Windows, dragging a few sliders to set the minimum and maximum luminance. If you’re using an OLED monitor, chances are you’ll get much better results with the HDR 400 mode instead of HDR 1000 in the Windows HDR settings. Try it for yourself, and use what works best for you. You’ll need to run a few games and movies to arrive at the best settings for your tastes.
1 Firmware updates
Sometimes necessary
While updating your monitor’s firmware should usually be avoided if your display is working perfectly, it might sometimes be necessary. The manufacturer might have addressed issues like high latency, buggy sleep mode, or other known connectivity problems. If you find a new firmware for your model, check the patch notes and Reddit posts about what’s actually changed. If the new firmware adds new features or addresses major bugs, it’s worth jumping to it.
Otherwise, err on the side of caution, and keep using your existing firmware. It’s not worth the risk of encountering new bugs, and if you’re not missing out on any new feature, skipping the new version is perfectly fine. In other cases, like that of the Dell Alienware AW3423DW, where the new firmware was downright essential, you’ll be missing out on improved performance. So, it needs to be judged on a case-by-case basis.
Your monitor doesn’t come pre-configured
Every monitor, no matter how good or expensive it is, needs to be tuned to your personal preferences. What looks natural or lifelike to one user might look washed out to someone else. You need to get into your display’s OSD to configure lesser-known settings like color temperature, gamma correction, and overdrive. The HDR experience of your display will also depend on your Windows HDR settings, so don’t ignore them either. And lastly, a new firmware might be essential if it fixes critical bugs and introduces new features.